After almost three years…Some suggestions

crick the audio above and listen. Turn down the volume if it is a little too loud.

It is hard to believe it is getting close to 3 years since the Covid-19 pandemic started. As I don’t have any new client opening most of the time, at least I would like to share my thoughts around the “mental health crisis”.

As a mental health counselor/art therapist, as well as a person on the planet earth, I have been working through this difficult time just like you, your family members and friends. I know it is not always easy. The below are very simple suggestions that I would like to make to help you feel OK.

We have been traumatized. There have been so many things we can be fearful about in the world. Unfortunately, fearfulness itself creates more fear. So how can we shake off some of these fearful things?

  • Acknowledge that things are sometimes unpleasant (sad, scary and annoying) and we are OK to feel those emotions. We don’t have quick and happy endings all the time. Validate your and your loved ones’ unpleasant emotions. You may not have solutions to change those feelings, but once you feel and accept those emotions it is easier to let yourself come back to here and now. We live right now, not in the past, regretting what we did not achieve. Worrying about things that have not happened yet does not change your future. Pay attention to when you feel happy, and what helps you to feel that way, such as warm sunshine, or watching joyful moments with your loved ones, including pets.
  • Limit your online time. This is very important and it includes your streaming time, and playing time with video games. Our brains are overloaded and overstimulated. This stimulation is reinforced by the flood of information and we feel like we can’t live without the internet. Remember, people were able to live without the internet and social media once upon the time. Reducing the time you spend with your cell phone gives you more time to do other relaxing or entertaining things and you should be more able to fall asleep naturally.
  • Dr. Cathy Malchiodi and Dr. Elizabeth Warson, my mentors in the expressive art therapy field, encourage us to move, sing and express ourselves in creative ways.

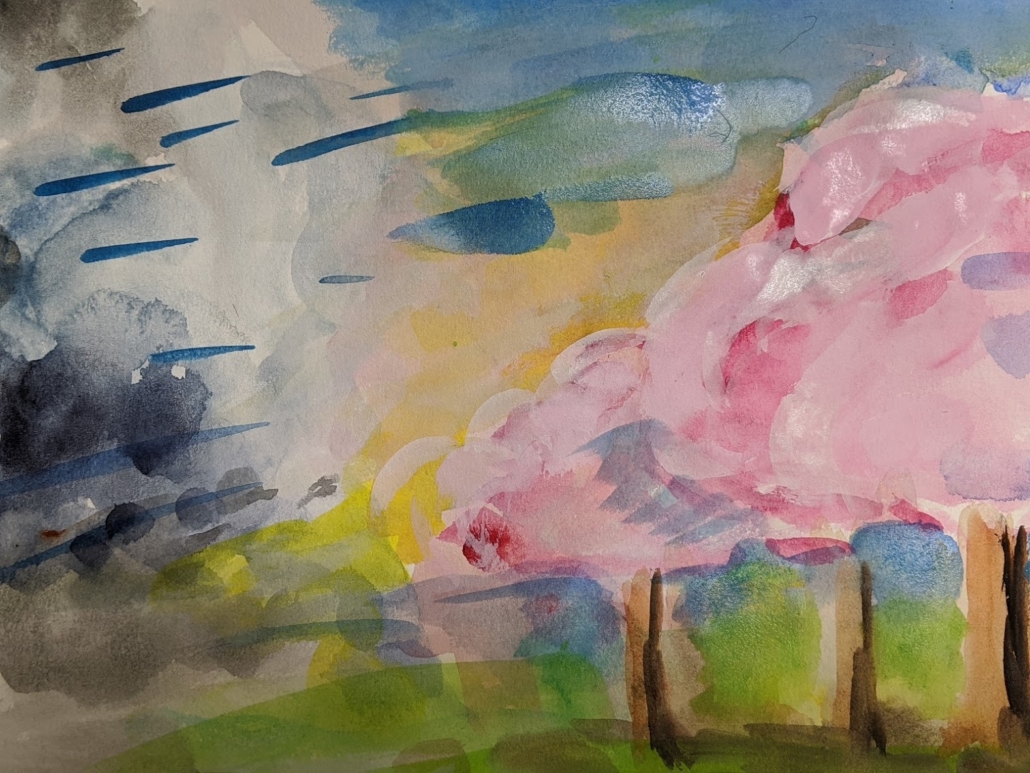
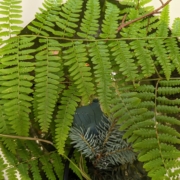
Walk in nature and use all your senses; right now, you may smell the dry leave and ripening berries and rain. Listen to nature, birds singing, water dripping. Observe and notice what is there. You may notice animal tracks, wet bright colored leaves, something you usually don’t pay attention to. You may take a small, unprocessed food item and eat it as if you have not eaten it before. Of course if you know about berries you find in nature, you may pick one and taste it. Your skin is the largest organ in your body; you can feel the wind, rain and temperature changes and use all your senses.

Now you continue to walk in the natural place. Pay attention to feel the gravity. Pretend to be held by the mother Earth. Imagine your feet are glued on the ground. You may feel the texture of the ground; sandy, muddy, gravely. Pay attention to your body. Do you feel any tension in your body? Please try to feel it. Then take a deep breath. A wonderful book about relaxing breath exercise is:

Breath :New Science of lost Art

Keep walking, keep feeling, using all the senses and feeling your body. You might want to investigate movement exercises demonstarated by Donna Eden in her Youtube video , Energy Work.

You can listen to music and move/dance. You may meditate. You can enjoy playing with your pets.

Please remember that it took us near 3 years to feel how we do, so be patient and kind with yourself.

Adult Face Shield Making Tutorial

By now we are accustomed to wear face masks in the state of Washington but it is sometimes helpful to have a face shield for talking while safe distancing. I like to be able to lift the plastic shield and have a sip of water as needed. This face shield is not meant to replace N95 masks, but rather is an additional rayer to increase our safety. Please visit ultralightoptics.com if you would like to buy a medical grade face shield.

You will need

  1. a sharpie marker
  2. a pencil
  3. a pair of scissors
  4. a hole punch
  5. elastic (shown is1/8 inch wide elastic) about 20 inch long
  6. a ruler
  7. Double sticky tape 0.75 inch wide
  8. two Chicago Screws 1/4″
  9. a 18″X12″ Foam Sheet
  10. a 12’X12″ Clear Craft Plastic .007 This polyester sheet is clearer than some of the commercially made face shield and you get good visuality. .007 means the thickness of the sheet in inches.

The above links will direct you to Amazon site where you will get more supplies than you need. You can buy a few Chicago Screws at your local hardware store or Etsy. I purchased an individual foam sheet at the local JoAnne. However, if you make 4 of them, the cost of each face shield will be around $ 6.50. The inexpensive commercial shields that sells around $7.00 often use clouded plastic and the plastic sheet is too close to your face.

  1. Cut 2 of 2 inch wide and 28 inch long strips from the foam sheet. Shorten one of them to 12″ inch long. Mark where you will punch holes later after taping together. It is harder to punch the thin foam sheet and ensure the holes are lined up, so better to wait til it is taped together.
  2. Cut 12″X 9.5″ plastic sheet and round the bottom corners with scissors.

3. Place the 3/4 inch double stick tape as shown on the photo. Make sure you have a half inch wide center area left, so you can fold the tape into half with ease. Tape the clear sheet on the tape.


4. Tape the longer foam tape as well

5. Punch out all the holes after taping all together. It may be a little difficult to squeeze the puncher into the tape but you should be able to punch it through.

6. Screw the two taped foam strips together. The holes on the shorter tape with plastic sheet meet the second holes on the longer tape.

7. Tie the elastics on the edge holes as shown above. If you like to erase the sharpie markings, use alcohol to wipe them off.

8. The mask is done. adjust the length of the elastic to fit your head.

How I see my clients during the pandemic!

When we must see face to face, this is how I see my long term clients in person.

Over 6 months into our new normal life with Covid-19 pandemic, it became clear that I need to create a system to safely see my adults clients in-person. The State of Washington still requests that we wear face covers inside small rooms. In the therapy setting, if we are meeting in person, it is important for us to see each other’s faces. Wearing masks can make us to feel short of breath if we talk for almost an hour. So…. this is a system that we have adopted.

1, The window and suite/studio doors are open. I am getting ready with portable heaters for us to continue into this Fall and Winter. The Bellevue office has a powerful air cleaner.

2. All of my clients signed a written consent agreeing to the daily safety practice and to cancel the session when they do not feel well.

3. When my client comes to my office, we both check our temperature. At this point, we are wearing facemasks as we are relatively close together.

4. The client washes their hands or cleans them with hand sanitizer. I also wash my hands between clients.

5. We sit down cross the table 6 feet away and if the client is not coughing, we switch to the home made face shield instead of masks.

6. When I prepare art media to do art therapy, I may switch back to my facemask as I get closer to my clients.

7. Once my client leave my office/studio, I clean all the seats and table thoroughly. art supplies used during the session go into the UV light box to be sanitized.

Ultra Violet light box

You see my computer and monitor far behind. I see 80% of my clients online now days.

Please visit the tutorial page for how to make the face shield.

children's face shield

Face Shield-Basic

This craft shield in no way replaces the N-95 mask or any other professionally prepared protection gear, but it is fun to create a face shield with children and talk about how Covid-19 can be spread and how we can help each other.

This blog helps you to make a basic children’s face shield and visit the decorative face shield for the monster maske shield and more!

Basic face shield

It has been difficult to adjust to our new life since March, 2020. We are entering the 5th month of the Covid-19 pandemic and restricted life here in Seattle/ Bellevue, Washington. Many school districts decided to start classes online in the fall.

Supplies to make a basic shield

You will need;

  1. A piece of sheet foam of any color, 9×12 inches. This is a thin solid spongy material, but not one with holes like a sponge.
  2. Half of a clear plastic report folder
  3. A roll of double sided tape
  4. 1/8 inch wide elastic – about 20 inch long
  5. A pen to mark
  6. Two brass paper fasteners
  7. A pair of scissors
  8. A single hole punch ( I used 1/8 inch hole punch)
  9. A ruler

Cut the foam, one 2 inch wide and another 1 inch wide, both 12 inches long.

Fold the 2 inch wide foam strip in half lengthwise to make a 1 in wide strip, Use the double sided tape to sandwich the clear plastic sheet between the two sides of the folded strip.

Punch 4 holes on the 1 inch wide strip ; 1/2 inch and 2 1/4 inch from each edge.

Punch 2 holes on the folded strip with the plastic sheet; 1 inch from each edge.

Join the two strips with the two paper fasteners as shown above. Make sure to use the round side inside, so you won’t be scratched when you wear the shield.

Insert the 20 inch long elastic into the holes and tie together.

Use materials like these to decorate the shield.

Monster Shield to protect us against Covid-19

Thank you Art

You may walk your neighborhood more often than you used to lately. I walk my dogs rain or shine throughout the year and it is nice, but sometimes encountering many runners makes me a little anxious. So …. avoiding the crowded(!) residential streets, I change my walking routes and started noticing the hearts decorating peoples’ houses. The movement was started by a Facebook page, Happy Heart Hunt. The page says: The group is created to spread HAPPINESS, LOVE, KINDNESS and POSITIVITY during these unprecedented times. Idea credits to kidsforpeaceglobal.org and Heather Henthorn.

Drawing heart shapes with young children is not easy. When in my fully equipped office, I had easy tools to trace and cut heart shapes. Now, doing sessions online, I discovered how easy it is to cut out heart shapes with just a paper, a pencil and a pair of scissors.

You pick a piece of paper, fold and draw a several half heart shapes like in the photo above, then cut the folded paper with a pair of scissors. You can make any size, wider or longer hearts very easily. The above paper was painted with watercolor before cutting. The below is a demonstration piece I created with one of clients. I just traced my hand and glued on the hearts.

springwindblowcorona

Inner journey after SARS-COV-2

springwindblowcorona
cherry blossom and spring wind blow the darkness away

Today is the first day of April. It is almost 3 months since we heard about the novel Coronavirus in Wuhan. Boy! I don’t even like use the word, “Coronavirus” in my title.

Here in Seattle, Washington we had the first novel coronavirus outbreak in a nursing home in mid to late February. It was followed by the major high tech companies ordering people who can work from home, to stay home, in the first week of March. The schools officially closed on March 13. The governor addressed the stay-home-order starting on March 25.

As I summarized the timeline, I can not believe this change of our life happened this fast. A month ago, I was not remotely aware that we live surrounded by virus and bacteria. We sometimes caught cold and needed to be a little careful of seasonal flu. I was not afraid of invisible danger; virus that could kill me and pass to other people. Now I am afraid of touching the boxes delivered to our house by the Amazon delivery people who risk exposure to the virus. I am afraid to touch the trash can after the weekly garbage collections. I touched my trash can without thinking and realized I had to wash hands and clean the door knob with alcohol because I touched the door knob after touching the trash can! I wore my hand sewn mask to go to the post office to mail the several masks to a family member who needs to go to work instead of staying home. The post office worker with a N95 mask was behind a clear plastic window. Still, as soon as I paid by credit card, I wiped my hand with hand sanitizer.

I wish this was an April fool joke.

Since I heard about the novel Coronavirus before it got the official name by WHO, SARS-COV-2, I read various reliable articles from Japan, UK and U.S and I was taking a position to be calm and prepared. I wiped the tables, chairs, around the sink, door knobs and light switch diligently with soapy water then sprayed alcohol each time my clients left. The building custodian disinfected three times per week. To tell the truth, nothing prepared me to be in the current situation.

As I continue to visit my clients at home online, I noticed everybody’s experience is unique and different in this difficult time. So you may be feeling safe and happy surrounded by your loved ones at home. You may feel isolated. You may be struggling to work while your children are at home. Your loved one may be sick. You may be working with patients with the Coronavirus and unable to stay with your family members. And a lot more….

So how to live with various situations?
This is what I do every day:
I accept things are difficult and different. I kept checking my emotions; fear, sadness and irritation. I allow myself to travel my distressing journey with equanimity. I walk every morning with my dogs. My dogs seem to be happy to be with human family members all the time.The neighborhood is oddly quiet. I see white pink cherry blossoms. The petals are blown by strong winds and the air is cold but very clear. This is a moment I feel joy and feel encouraged that we all go through this.

Let’s acknowledge each moment’s various feelings and let them pass. We feel sad, then experiences a moment of joy. Do not despair. We feel afraid of specific things such as a door knob that somebody just touched. You can wipe the knob and wash your hands. Wash away your fear. Soapy warm water helps us to feel relieved. it even smells good. I understand the worries about financial future but let bring our mind back to now and feel the earth under the bottom of your feet. That helps us to feel grounded.

We can also paint just blending colors. Many suppliers are overwhelmed and off course we need to prioritize the essential goods to be delivered to your home but I hope painting helps us to focus on present and to maintain good enough mental health. The materials I recommend my clients to use are;

Watercolor papers-you can use any paper but this inexpensive watercolor papers suck water and you can enjoy painting more. Unfortunately it will take several weeks to be delivered to you…
https://www.amazon.com/gp/product/B004M59O4C/ref=ox_sc_act_image_1?smid=ATVPDKIKX0DER&psc=1

This heavyweight construction paper pad is still in Amazon warehouse. I think you can use this for painting.04/02/2020
https://www.amazon.com/gp/product/B00008XPFZ/ref=ox_sc_act_title_1?smid=ATVPDKIKX0DER&psc=1

My favorite water paint set from Pentel. You can let paint dry and use like a typical dry watercolor pan or use just out of tubes to get the mat and strong strokes like tempera paint. For years I was buying those from Japan and am very happy that Pentel started selling them in reasonable price in US. Still in Amazon warehouse. 04/02/2020
https://www.amazon.com/gp/product/B0091GATMI/ref=ox_sc_act_title_6?smid=ATVPDKIKX0DER&psc=1

You also need paint brushes, watercan and paper towels.

Calming Bottle

This is the most popular activity for my clients at my clinic. It is very easy to create a one of a kind sensory bottle. We shake it and watch the object move and float. It helps us to calm down and be mindful.

What you Need:

Plastic Voss Water Bottles 330ml(11.15OZ) This is a bottled water from Norway and perfect to use for this project. They sell the bigger plastic one and glass bottles but I like the smaller bottle for this project. You should be able to buy them on Amazon or local grocery store like Fred Meyer in Seattle. It is not more expensive than other quality bottled water and the water is tasty.

what you put into the basic bottle
  • Water Beads-Most children call them Orbeez. When the beads are dry, they are smaller than 1/8 inches. After you soak them in water several hours, each bead becomes a 1/2″ diameter squishy ball. I usually buy them from Amazon. The one I purchased was named Jelly Beadz. The beads I purchased at the flower arrangement section of local craft store lost color after a little while in water.
  • Glitter in various sizes- Some glitters are more like powder and some are almost like confetti. Experiment by adding small quantities of glitter and water into the bottle and shake the bottle to see how it turns out. Please do not throw away the water with glitter into the sink, it is easy to drain into the ocean passing the processing plant. The glitter is small plastic bits that do not decompose and damage the ecosystem, so please think about marine animals. Glitter should be strained out of water with a coffee filter and thrown into the trash.
  • Water and small amount of liquid water color or food coloring. Usually glitter itself will make water colorful when you shake the bottle, so put small amounts of colors as needed. If you add too much, you will not see the floating beads and glitter. In the past, I added glycerin to help the beads and glitter move slower, but glycerin is perfect food for bacterias. Over the time, the water became cloudy and stinky.
Variations
  • Add something heavy like plastic beads. It makes interesting sounds, too.
  • Add something that will float such as small rubber bands, animal shaped rubber bands and shredded plastic wrapping paper.
  • Add glow in dark acrylic beads. Make sure to have a UV flashlight to shine on the beads before turning off the light.
  • Add Mineral Oil. Baby Oil is usually just mineral oil with fragrance and is relatively pricy. By adding oil which flows, you can get a different effect.
  • Add Sand and shells to mimic a beachside water scene
  • Make several different color bottles to reflect your mood
Mineral oil, sea shells and sand

How to build the calming bottle

  1. Take off the label from the Voss water bottle. If it still has stickiness on the surface, use masking tape to remove the glue, quickly tapping the sticky tape onto the residue to lift it off.
  2. Add water beads, glitter and confetti into the bottle and add water to a little less than half of the bottle. Close the lid and shake the bottle to see if you are getting the desired effect. Add more items to the bottle if you like but it is best you add a little by little, since throwing away the glitter into the sink can be harmful to marine life and wasteful of art materials.
  3. Fill up the bottle with water and add color into water. I use one or two drops of liquid water color.
  4. You may glue the lid to prevent spilling water accidentally.