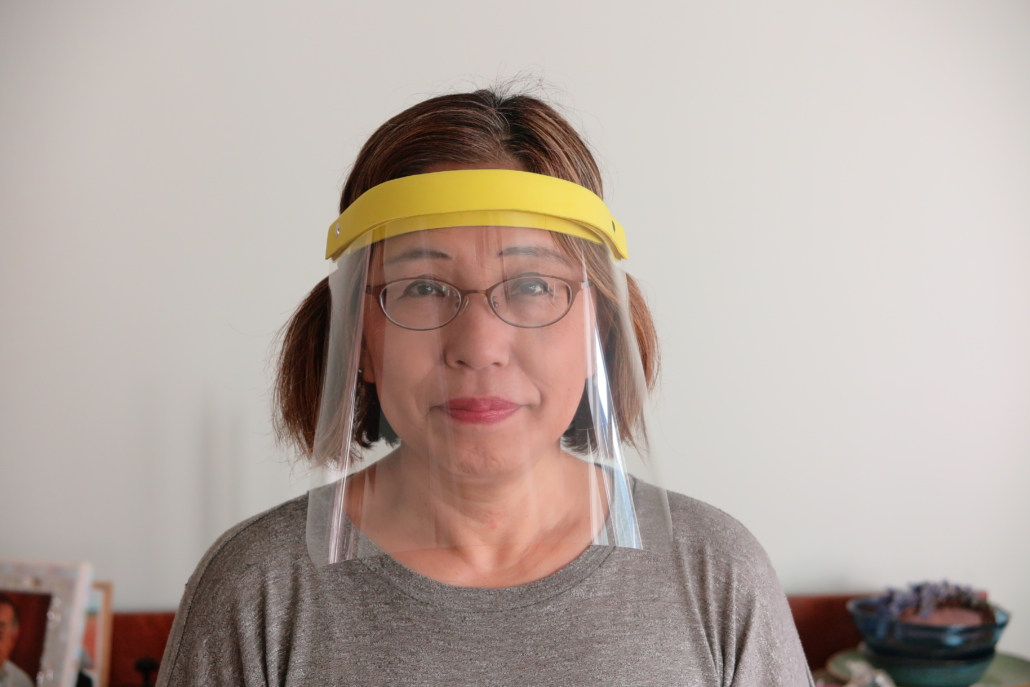
Adult Face Shield Making Tutorial
By now we are accustomed to wear face masks in the state of Washington but it is sometimes helpful to have a face shield for talking while safe distancing. I like to be able to lift the plastic shield and have a sip of water as needed. This face shield is not meant to replace N95 masks, but rather is an additional rayer to increase our safety. Please visit ultralightoptics.com if you would like to buy a medical grade face shield.
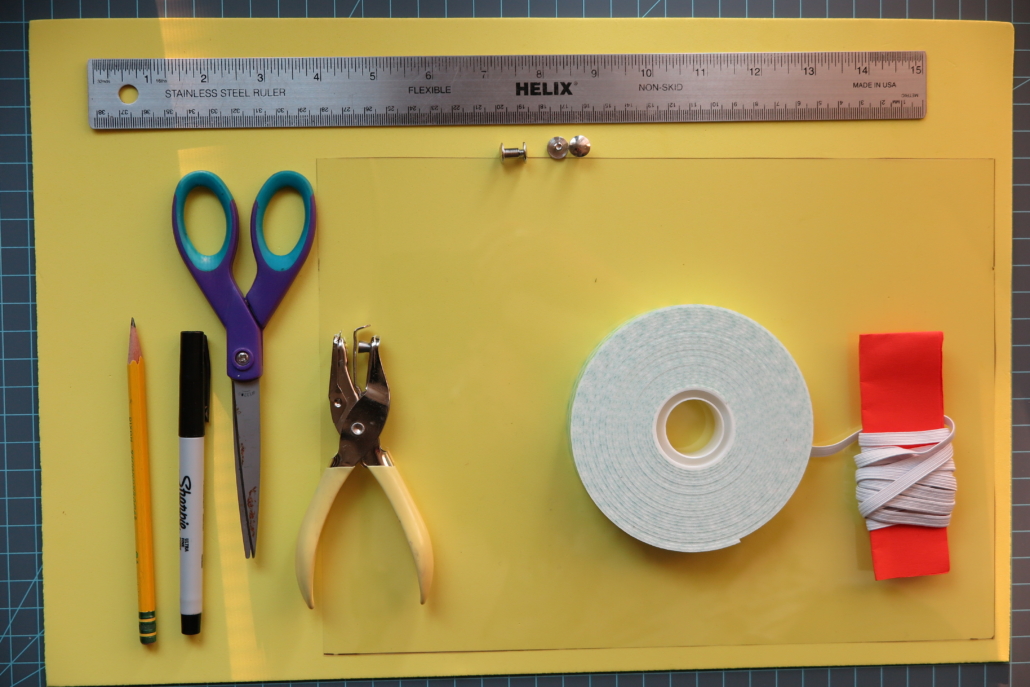
You will need
- a sharpie marker
- a pencil
- a pair of scissors
- a hole punch
- elastic (shown is1/8 inch wide elastic) about 20 inch long
- a ruler
- Double sticky tape 0.75 inch wide
- two Chicago Screws 1/4″
- a 18″X12″ Foam Sheet
- a 12’X12″ Clear Craft Plastic .007 This polyester sheet is clearer than some of the commercially made face shield and you get good visuality. .007 means the thickness of the sheet in inches.
The above links will direct you to Amazon site where you will get more supplies than you need. You can buy a few Chicago Screws at your local hardware store or Etsy. I purchased an individual foam sheet at the local JoAnne. However, if you make 4 of them, the cost of each face shield will be around $ 6.50. The inexpensive commercial shields that sells around $7.00 often use clouded plastic and the plastic sheet is too close to your face.
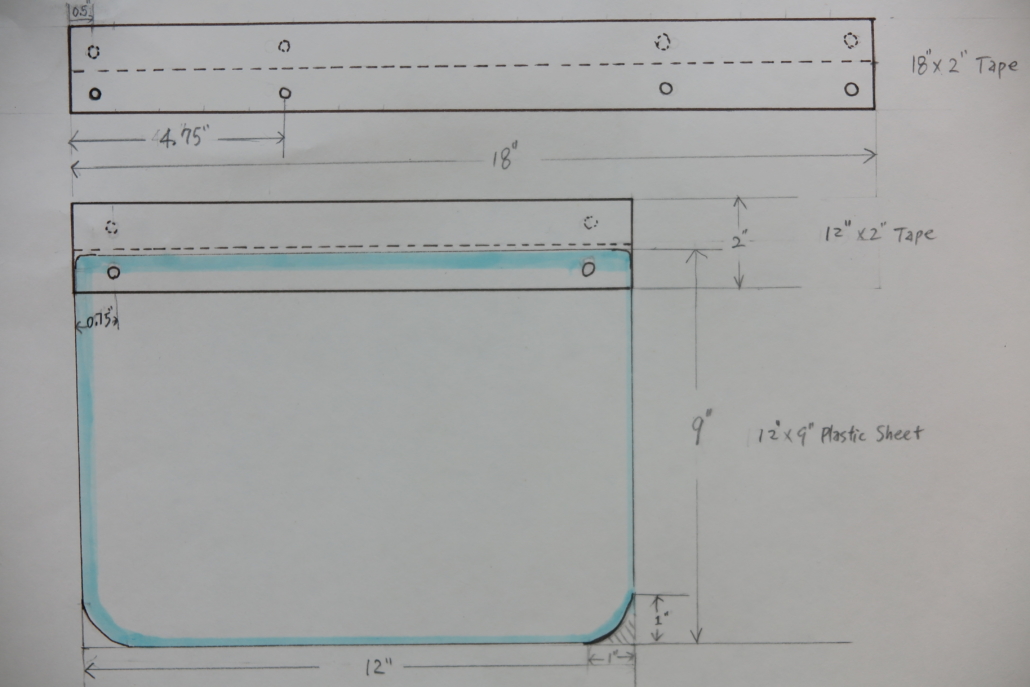
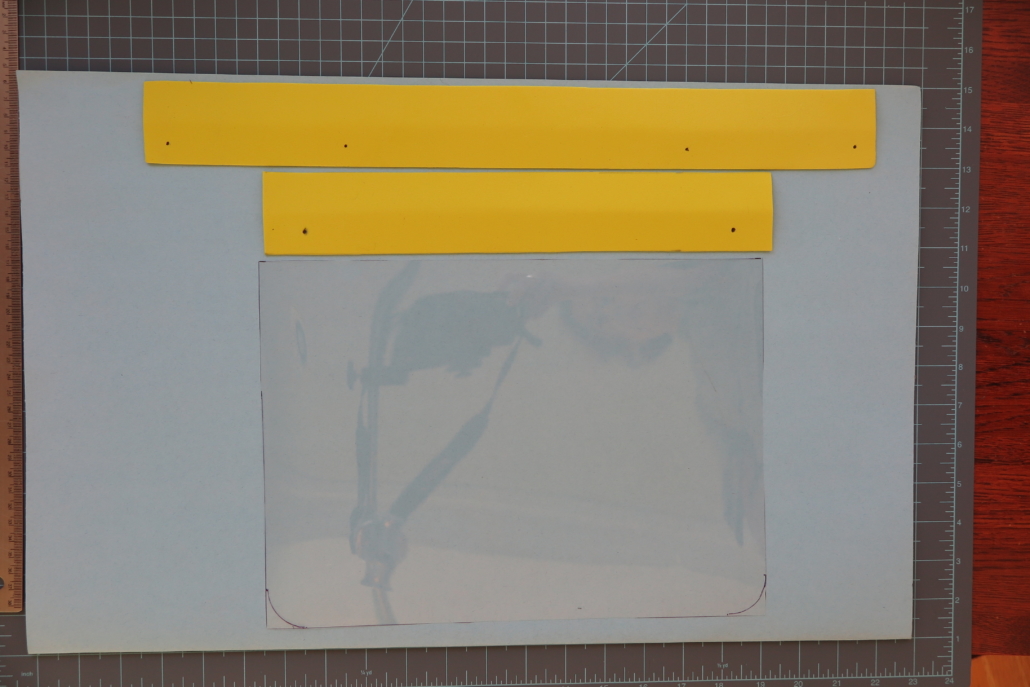
- Cut 2 of 2 inch wide and 28 inch long strips from the foam sheet. Shorten one of them to 12″ inch long. Mark where you will punch holes later after taping together. It is harder to punch the thin foam sheet and ensure the holes are lined up, so better to wait til it is taped together.
- Cut 12″X 9.5″ plastic sheet and round the bottom corners with scissors.
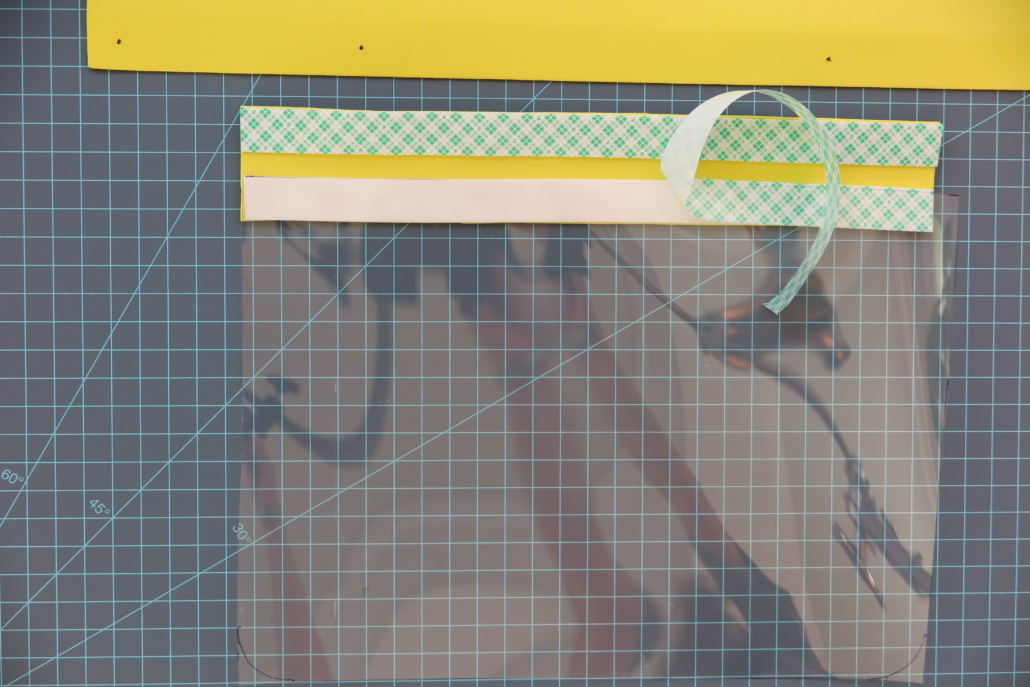
3. Place the 3/4 inch double stick tape as shown on the photo. Make sure you have a half inch wide center area left, so you can fold the tape into half with ease. Tape the clear sheet on the tape.
4. Tape the longer foam tape as well
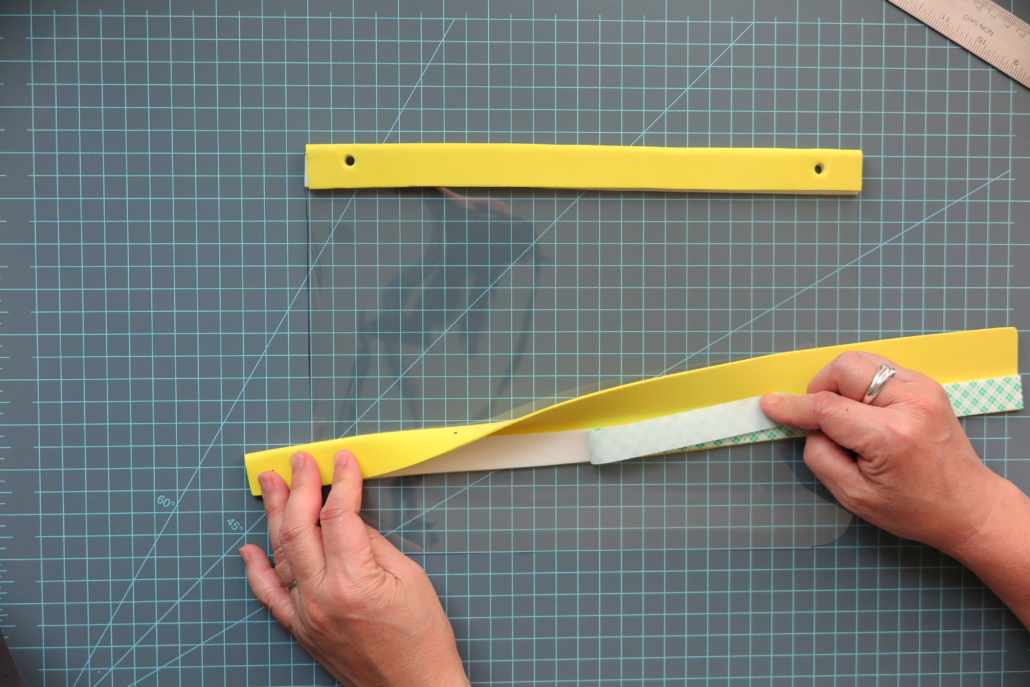
5. Punch out all the holes after taping all together. It may be a little difficult to squeeze the puncher into the tape but you should be able to punch it through.
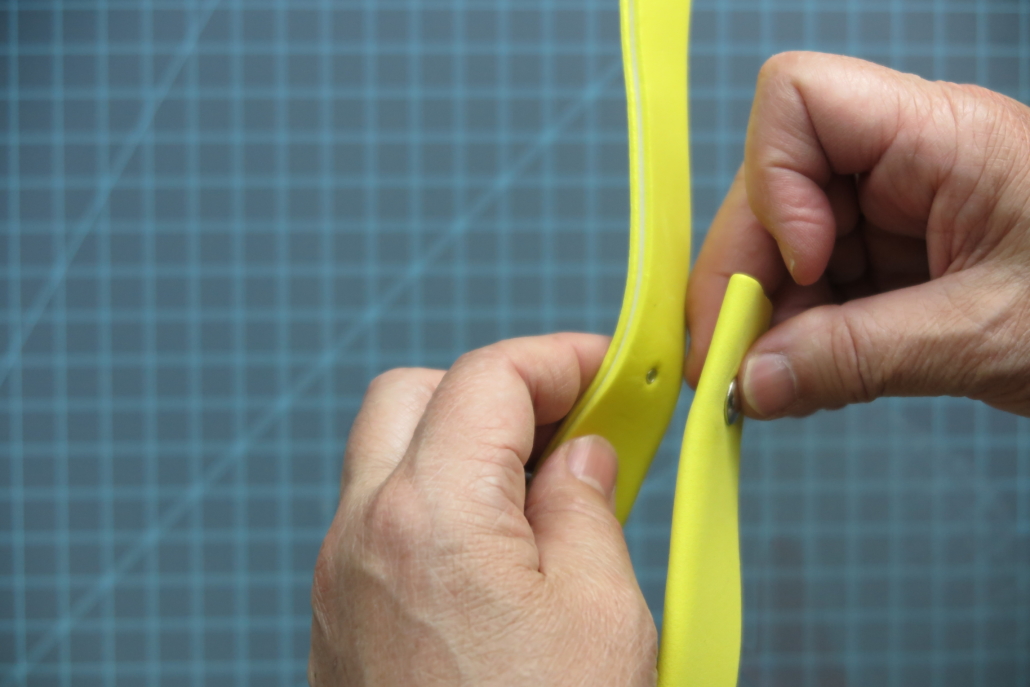
6. Screw the two taped foam strips together. The holes on the shorter tape with plastic sheet meet the second holes on the longer tape.
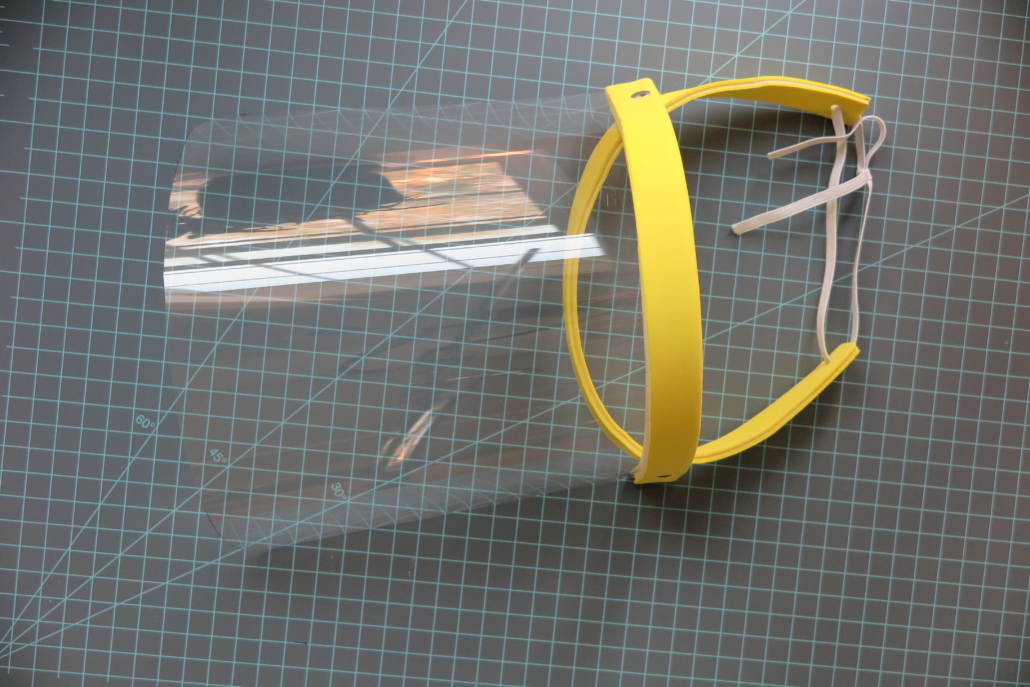
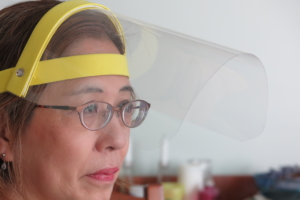
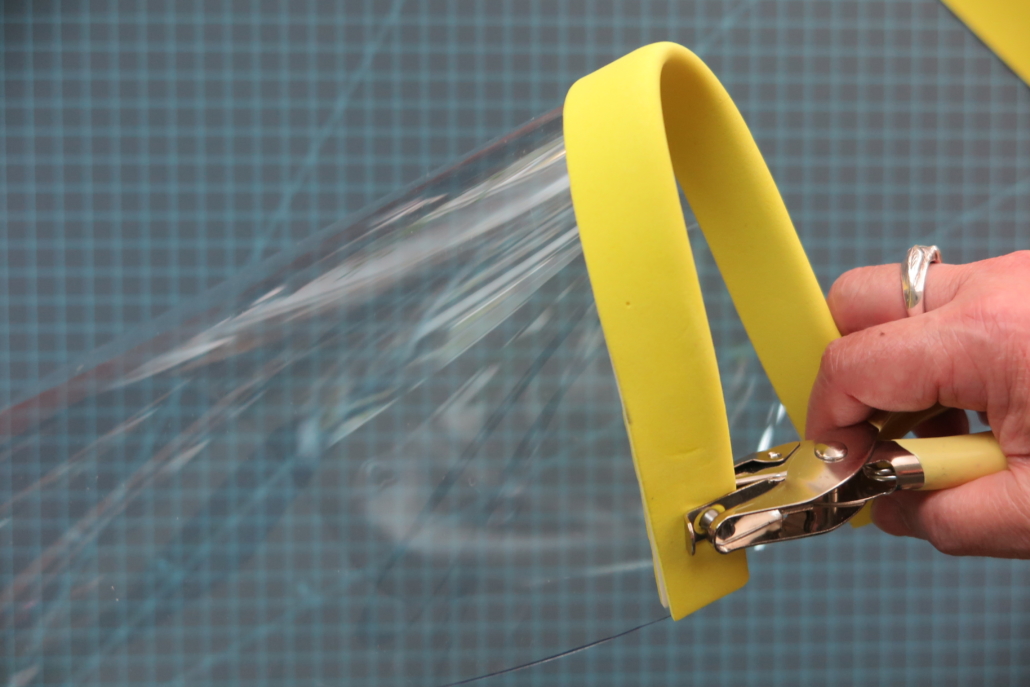
7. Tie the elastics on the edge holes as shown above. If you like to erase the sharpie markings, use alcohol to wipe them off.
8. The mask is done. adjust the length of the elastic to fit your head.

